Showing posts with label Boatbuilding. Show all posts

Thursday, 31 December 2009

Japanese Oars


This picture on Indigenous Boats gave me pause. What on earth are those oars with handles all about?
The picture was provided by Douglas Brooks, who is researching traditional Japanese boats or wasen in the finest possible way, by getting apprenticed to boatbuilders and making a few.
Douglas writes to say that the boat is probably a kaidenma, a fishing boat that was used to pull a net round a school of fish, like seine fishing over here. According to Douglas:
That is a photo from Akita Prefecture way up north, where they do use a large clunky paddle like an oar. Interesting in some ways because they have more western style oars up there, but I suspect that in a narrow boat those short things have advantages.
As far as how they work, its used just like an oar, with a rope oarlock and sometimes a thole pin. I have also seen these used hanging in a rope loop and used like a steering oar. In fact the shimaihagi that I built in that region in 2003 was so equipped.
You tend to see these in boats with many rowers, yes they have to take a short, abbreviated stroke, but what these guys are doing is pulling a net around in a circle to close it, so its not intended for long distance travel - they may have even been towed out to sea by partner fishing boat. In a few places in Japan these are called kaidenma and are now used in festival races. It may look terribly inefficient, but these boats really fly when you have twenty or so guys rowing.
Douglas has two fascinating sites, his blog chronicling the construction of a traditional sabani on the island of Okinawa, currently under way, and his website which is a huge source of information on the Japanese and American ways of boatbuilding.

Monday, 12 May 2008

Anyone for Flashboats?

Here's an interesting proposition. Brian Pearson writes:
"Hi Chris,
Following up our interest in Cornish Flashboats. John Hesp (the designer with a cnc routing table) and his brother are needing to get on the water and their solution is to make two tortured ply Flashboats as per Paul Gartside's Flashboat article I sent. John has asked me if I would also be interested in a kit. John knows a current builder in Cornwall of Flashboats.
I have said I would be and thought I would e-mail you to see if you might be interested, and also if perhaps anyone following your excellent Rowing for Pleasure site might be.
It would be fun to have a few built at the same time. No costings yet but with it using 3mm ply and very little of it, the kit should be economic to produce.
Had a lot of fun scaring myself sailing the MacGregor canoe (left). Very narrow with 50 sq ft. The leeboard helped steady her up a great deal.
All the best.
Brian"

Paul Gartside has an excellent description of the building process for his Flashboat here, and line drawings here.
I am a bit apprehensive about the 'intermediate' skill level, and the fully rebated stem the Flashboat requires, though most of the difficulties may well be avoided by buying the kit. Torturing the plywood still presents something of a challenge, however.
It is certainly very tempting and a very, very lovely boat. Paul's picture of him on the beach with the Pacific rollers in the background shows the sort of conditions the boat is capable of handling at a pinch.
Unfortunately for me, I have just come to the conclusion that John Welsford's Walkabout must be my next boat, because it is designed for sleeping in. But if the kit was cheap enough, I could just slip the Flashboat in first, just for fun....
So is anyone else interested in a Flashboat kit? Do get in touch and we'll see if we can get a bulk order in.

Tuesday, 4 December 2007

Transatlantic kayak


Peter Bray paddled this canoe from Newfoundland to Ireland solo and unsupported, in 2001. It took him 76 days. The boat is 20ft long and just two feet wide, which is not big enough to tempt me onto the ocean. It was designed by Jason Rice and built by Kirton Kayaks.

Sunday, 11 November 2007

Venice


Another piece originally written for Duckworks Magazine, after a trip to Venice.


I hadn’t realised that not all boats in Venice are gondolas. The Venetians have developed a type of boat for every conceivable purpose, from little personal craft to delivery barges. My first picture shows the contrast between old and new. On the left is a wooden sanpierota, named for the island in the lagoon where it was first developed. Sanpierottas are small work boats, the ‘white van’ of Venice. On the left is a buzzy little plastic motor boat that young people sit in for hours, chatting, while they rev the engine.
Some sanierottas are elegant craft for family transportation.
Everyone’s favourite boat is the sandolo, very small, light and fast. They are rowed standing up, facing forwards, with crossed oars. Every Venetian learns how to do this while we were learning to ride bikes. The complex wooden oarlocks are called forcole, and come in everyday and luxury versions. The everyday ones built for strength and utility, and are deliberately made plain so that no one will steal them! Luxury forcole are works of art, carved in ornate shapes from walnut or wood from a fruit tree, and often decorated with gold leaf. I snapped the young man sculling his sandolo down the Grand Canal, perfectly at ease despite the motorway traffic of water buses, water taxis, phut-phut boats and, of course, gondolas.
The UPS truck of Venice is the topa, a traditional barge that used to be sculled but is now inevitably engine driven. Here is a topa delivering stock to a corner shop in the San Polo district.

When Venetians get the builders in, they arrive on a huge steel barge that forms a floating building site, and, just like builders everywhere, block the road for weeks on end.


I could not go to Venice without taking the obligatory picture of gondolas.


One of the wonderful experiences of Venice is taking the taxi to the airport. The water taxi, that is. Is there anywhere else in the world where you can do this? The sunset picture was taken as the water cabbie opened his engines out and sped over the lagoon at incredible speed. Great.

Saturday, 10 November 2007

The author at the oars


I've been looking through family photo albums and discovered this pic of me rowing stroke on the Upper Thames in 1960 with Dad at bow. The boat was a beautiful mahogany double skiff called Snarleyow. Somehow, I can't remember a single day when it rained.

River Arun

Last August I rowed up the Arun from Littlehampton to Arundel, mainly to test the new positions of my riggers.
The lower Arun is a strangely unattractive stream, because the lovely scenery is hidden by the featureless river walls that imprison the water in its channel. Some simple landscaping, perhaps with a few trees, reed beds and perhaps a few artificial beaches would make the river much more attractive and attract more boaters and walkers.
The slipway at Littlehampton is new and magnificent. All the old woodsheds that used to line the river have been replaced with flats and the area is now buzzing. There are even a few restaurants and bars.
The car park includes several double length bays for cars with trailers, a very useful feature. River licences can be bought at the nearby shop, but boats without engines are free.
The aim was to be wafted upriver to Arundel by the tide. There, I would hang around at the Boatyard & Tea Garden until the tide turned and waft gently down again. I miscalculated rather - you only need to set out about an hour before HT to catch the flow, and if you set out earlier you have to wait up to four hours for the tide to change, such is the length of the river.
The reach up from Littlehampton is lined with flats, boat clubs and a couple of big wharves for gravel barges.
Then it gets a bit boring until Ford, where the end of the old Chichester Canal can be seen. The pub does camping and has a slipway.
The rail bridge looks a bit intimidating but is easy to negotiate.

The river is rather featureless from then to Arundel, which is incredibly pretty. The bridge is very low (in the floods a couple of years ago the water came nearly over the parapet, a very alarming sight).

Upstream of the bridge is the Boatyard & Tea Garden. The bank consists of a series of concrete steps, which make getting out very awkward with the outriggers getting in the way. But the staff were very friendly and the tea plus slice of sticky cake was delicious.
Then I tried to get back in, missed my footing and fell in the river. Blast. The boat hire people were superb, bringing an electric pump and a battery to bail the boat, and even offering me a dry sweater to wear. I managed to dry out more or less on the row back to Littlehampton, though.
For a rower, looking back at Arundel is the best view of the town with the RC cathedral, the old parish church and the Duke of Norfolk's castle lined up on brow of the hill.

Monday, 5 November 2007

Rowlocks need to be adjusted vertically too!

Here's another piece I wrote for Duckworks, which appeared last week.

Every so often on the boat forums, someone asks how to position the rowlocks on a rowing boat correctly. They inevitably want the spacing between the seat and the rowlocks, but I have discovered the hard way that the vertical adjustment of the rowlocks is just as important for comfortable rowing, especially with a sliding seat. My sliding seat skiff Snarleyow (Andrew Wolstenholme’s lovely Sprite design) has always felt a bit cramped. I am average height (6ft 5in), and getting my knees up between my arms as I moved forward was a tight squeeze – I almost had to scrape the oar handles down over my shins to keep the blades out of the water.
Recently, matters got even worse, which may be something to do with my waistline getting even more average. I would have to breath out to allow room for my knees, so breathing had to be strictly coordinated with rowing. I could only take a dozen or so strokes before stopping for a quick gasp.
When I started rowing Nessy, my Sandpiper dinghy designed by Conrad Natzio, I was amazed at how relaxed it was. I could row steadily for ages without stopping for breath. It was partly because the seat was fixed, of course, but I soon realised that the higher position of the rowlocks also made things a lot easier.
I decided to raise the rowlocks on Snarleyow too, by putting a spacer blocks under each rigger and a new hole through the hull for the supporting strut underneath. A rootle round the shed produced an offcut of Douglas fir of exactly the right dimensions (and the domestic authorities said I hoard stuff!). I cut it into four, drilled a hole through each one and bought four long bolts to secure the riggers in their new positions.
Snarleyow was transformed. My wrists no longer tried to bash my knees, and rowing became relaxed and flowing. Suddenly, I could row for long periods without having to take a breather. The next step was to make the job permanent by shaping and sanding the blocks and gluing them in position with Balcotan. A spot of varnish and she was ready to go. Here I am, rowing at the HBBR national meeting at the Cotswold Water Park this year, a picture of relaxed elegance and grace.

Sunday, 4 November 2007

Building Nessy


I built Nessy in the summer of 2005. This was written in 2006 for Duckworks Magazine.

It was reading my 10-year old daughter her bedtime story that decided me to build a sailing dinghy after decades of rowing. It was Swallows and Amazons, the classic tale of children spending their holidays sailing in the Lake District in the 1930s.
What impressed both of us was the way their parents let them go out on their own for days on end without supervision or even mobile phones. There is no mention of PFDs either. Their father, at sea with the Navy, gives his permission in a telegram reading "BETTER DROWNED THAN DUFFERS IF NOT DUFFERS WONT DROWN".
I mean, if my wife and I arranged our family holidays like that they would take the kids into what they laughingly call "care" and put us away for a thousand years.
Anyhoo...Nichola seemed keen on learning to sail so I started looking for a design.
Simplicity was key. In the book, Swallow was said to be ideal for children because it had a single sail and no centreboard, and that seemed good me too – I haven’t handled a sail in thirty years although I have been rowing all that time.
Bolger and Michalak designs were obvious contenders but I wanted something more traditional, in appearance at least.
It would also have to be built mainly outside on a gravel surface so precision engineering would be impossible.
At the 2005 Thames Boat Show at Beale Park I tried the Sandpiper, a Bolger-inspired flat-bottomed skiff designed by Conrad Natzio. It was just the job - simple and robust but with a jaunty workboat look.
I bought the plans from Conrad at the show, and started the search for cheap materials and parts as soon as I got home. I was under the usual delusion that it would be on the water by teatime.
Despite my resolution to stick rigidly to the plans, the first thing I did was change the butt straps joining the plywood sheets to epoxy tape. I hoped the epoxy would be invisible and the gentle curves of the ply did not look like stress hazard.
Dave Carnell's invisible butt joints offered an enticing combination of effectiveness, speed and simplicity - just the thing for a lazy and hamfisted builder!
My big mistake was to not to join the ply sheets before cutting. That way, I could have easily kept the edges nice and straight. As it was, I had to tape and epoxy the ends of two long side pieces while trying to keep them straight and inevitably ended up with one slightly banana shaped. The necessary adjustment means that the finished boat is an inch or so less freeboard than planned but so far no-one seems to have noticed....
I tested the joints scientifically by giving the side pieces a vigorous shake – and one failed. However, by then I knew the drill better and the finished parts passed the shake test with flying colours.
The next mistake was not to give the plywood a bit of a sand while it was all nice and flat, which might have saved a lot of effort later on.
And then there was the transom. I bevelled the edges the wrong way, so the frame was on the outside as though the boat had its trousers on inside out. I concealed this with an extra skin of ply, which actually makes the boat look a bit smarter at the stern.
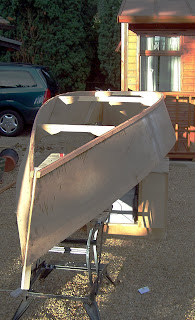
Construction then moved outdoors, onto an old bedroom cupboard and a couple of saw horses.The boat is assembled on the frames without the need for a strongback. Quick and simple. I began to appreciate the jigless, low precision construction method, ideal for those with no proper facilities.
I also began to appreciate my son's friends.
When I found I did not have enough hands to hold the gunwales and chine logs in place for clamping, I grabbed a couple of son’s friends as they passed and, to my surprise, they helped willingly and even showed an interest. Then reverted into layabouts. Sigh.
One serious delay was not daring to get on with the sail, as I really did not have a clue despite reading Dave Gray’s excellent advice at http://members.aol.com/r7dg/library.htm. Eventually I screwed up my courage to the sticking point, as the poet says, and bought a white polytarp on eBay (15 quid), a couple of rolls of double-sided carpet tape and some white duct tape. Waited till the wife went out for the day and cleared the dining room for a sail loft.
I had never thought that the eyeleting punch and die that my father left me (with a few hundred brass eyelets in a jamjar) would ever come in handy, but their time had come. The sail looks much better than my terrible craftsmanship would justify.
Launch day was not until January. The official temperature was about zero, but the sun was out and there was only breath enough of wind to fill the sail. For a maiden voyage, it was heaven.
The following week I sailed at Dell Quay (where the Romans invaded in 43AD) and a photographer called Bryan Davies was there. I yelled out my email address and by the time I got back these pictures were waiting in my in tray. Isn’t technology wonderful?